

Tutorial & 2º Desafio - 13º Projecto / 2nd Challenge - 13th Project
Para compensar a minha falta de assiduidade no blog, hoje trago-vos um tutorial de uma reciclagem que fiz.
Para quem não se lembra e/ou começou agora a ver o meu blog, decidi fazer um desafio para reciclar tudo o que conseguir e continua de pé, uma vez que com a minha mudança para Inglaterra quase todos os meus materiais ficaram em Portugal, por isso aproveito todos os materiais que posso para criar!
Vamos então começar pelos materiais necessários:
- Uma vela
- Isqueiro ou fósforos
- Pinça
- Tesoura
- Forma de plástico de pacotes de bolachas
-<>-
To compensate for my lack of attendance on the blog, today I bring you a recycling tutorial I did.
For those who do not remember and/or just now began to watch my blog, I decided to make a challenge to recycle everything I can and it still stands, since with my move to England almost all my materials stayed in Portugal, so I have to take advantage of all the materials I can to create!
Let's start with the materials needed:
- A candle
- Lighter or matches
- Tweezers
- Scissors
- Plastic mold from biscuit packets

Comecem por cortar individualmente cada uma das formas redondas.
-<>-
Start by cutting each individual round shapes.


Depois recortem à volta, deixando as pontas mais salientes, para fazer as "pétalas".
-<>-
Then cut all the way around, leaving the tips more salient, to make the "petals."


Acendam a vossa vela.
-<>-
Light your candle.

Com a pinça, agarrem na forma e aproximem da vela, com cuidado para não queimar demais!
-<>-
With your tweezers, grab the form and approach it to the candle, being careful not to burn too much!

A forma vai começar a encaracolar.
-<>-
The mold will start to curl.

Se tudo correr bem, irão obter algo deste género:
-<>-
If all goes well, will get something like this:

Podem também fazer com formas coloridas, o processo e o resultado são semelhantes:
-<>-
You can also do this with colored molds, the process and outcome are similar:


Depois das formas estarem todas encaracoladas, podem simplesmente encaixá-las umas nas outras, usando cola para as juntar, e finalizar com uma missanga ou botão no centro ou continuar a ver o tutorial para verem como fiz!
Com um objecto pontiagudo, façam um furo no meio de cada forma.
-<>-
After all the forms are curled, you can simply put them together, fitting them inside each other, using glue to stick them together, and finish with a bead or button in the center or continue to watch the tutorial to see how I did!
With a sharp object, make a hole in the middle of each mold.
With a sharp object, make a hole in the middle of each mold.

Juntem as formas e confirmem se os furos batem certo.
-<>-
Stack the forms together and make sure that the holes match.


Cortem cerca de 33cm (13 inch) de arame de aluminio com 2mm (0,08 inch) de espessura e escolham uma missanga que entre no arame.
Nota: Façam o furo proporcional ao vosso arame.
-<>-
Cut about 33cm (13 inch) aluminum wire with 2 mm (0.08 inch) thick and choose a bead that fits in the wire.
Note: Make the hole proportional to your wire.
Note: Make the hole proportional to your wire.

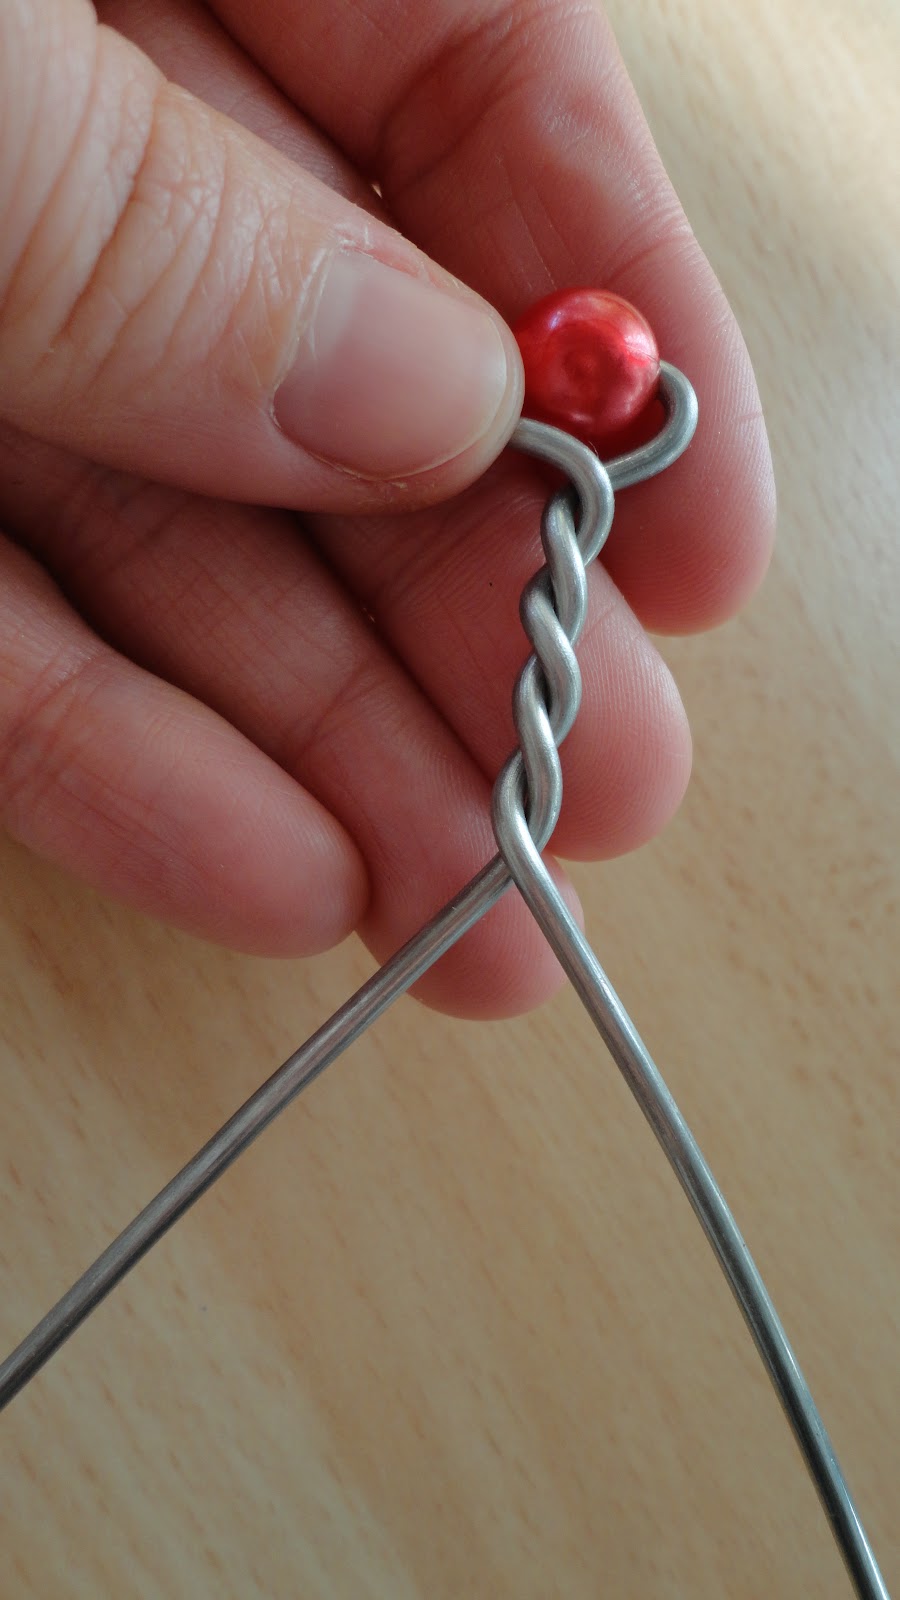
Dobrem o arame de forma a "abraçar" a missanga.
-<>-
Bend your wire like its "hugging" the bead.


Comecem agora a torcer o arame até ao fim.
-<>-
Now twist the wire until you reach the end.
Por fim basta inserir o arame no buraco que fizeram anteriormente.
-<>-
Finally just insert the wire into the hole you previously made.

Voilá!


Não se assustem com a quantidade de passos porque é muito simples de fazer, apenas quis documentar tudo para ser mais fácil seguir.
Se tiverem dúvidas, não hesitem em dizer.
-<>-
Do not be alarmed by the number of steps because it is very simple to do, I just wanted to document everything to be easier to follow.
If in doubt, do not hesitate to ask me.

If in doubt, do not hesitate to ask me.
Linked here

Linked here


0 lovely comments:
Enviar um comentário